Monday, January 21, 2013

Seashells Baby Blanket

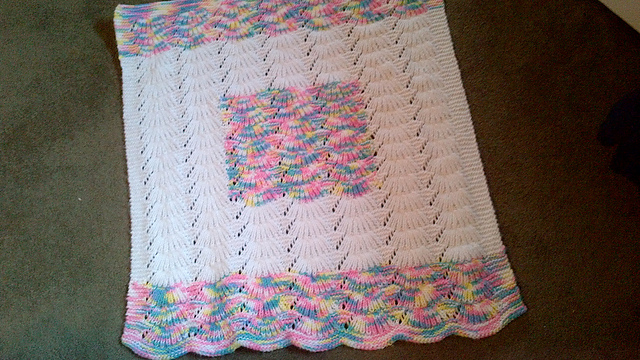
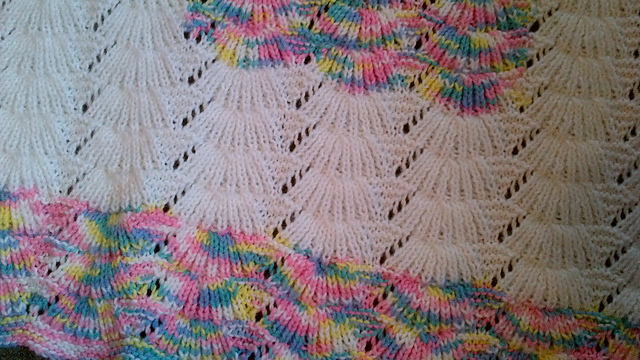
This is a beautiful pattern and quite easy to memorize. It is from one of the pattern testing groups. I wanted to make something for the soon to be born babies, and this pattern caught my eye. I thought the multi coloured would be good for either a boy or a girl, but once it is knitted it is pretty heavy on the bright pink so perhaps it will be destined for a girl baby.


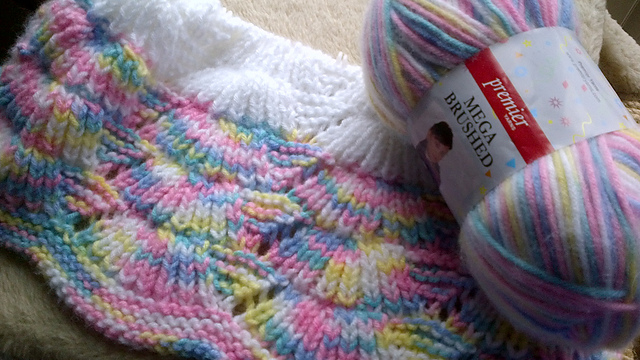
I used a yarn called Mega Plush by Premier yarns that I found at the Mary Maxim tent sale in the summer. I bought 3 skeins of the bright, and 4 of the white and another 4 in cream. I intended to make it all the multicolour but once I started I found that I was not going to have enough of it to make the entire large blanket (which I thought would be more useful than the small size). Some of the other testers made stripes using 3 colours, which is really nice, but I already had a good chunk made of the multicolour. I could have frogged it and started fresh .... but I improvised and decided to use some white to frame a rectangle of the bright colour. I am happy with the result. :D It is about 32 inches x 32 inches in size. I should have done 2 more repeats of the white pattern before and after the bright centre, and 2 more in the centre. But, I was not unhappy with the way it looked so left it as a square!


Before I added the white I looked for some more of the original colour but found that even the yarn company site does not list it any longer so I can only deduce that it has been discontinued, which is a shame. It is a lovely soft yarn and made a nice thick blanket but it still knit up to the gauge given for the needles size.


I will make a hat and some bootees to go with the blanket but first I need to finish the lowtide cardigan I have been working on. I just have one sleeve to finish on it. So there will be a post about it later this week!

Monday, January 14, 2013

More Toys!

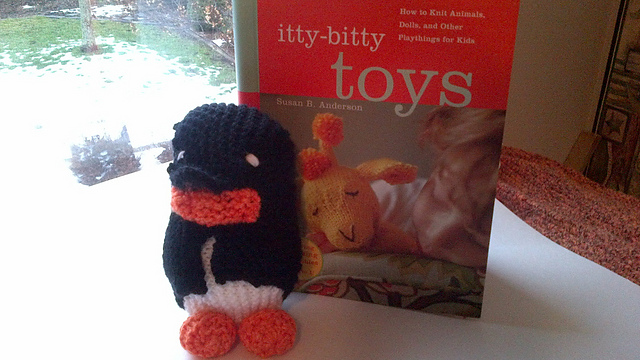
I have had some fun making a few things from the books I got for Christmas. The penguin is from Susan B Anderson's book, Itty Bitty Toys. I wanted something easy to make as I sat at the hospital visiting and this fit the bill. My gauge must have been off some as I think the black and white should have been squares rather than rectangles, but I got them to work okay. I will make something with a little more challenge next, the bunny I think, ready for Easter!


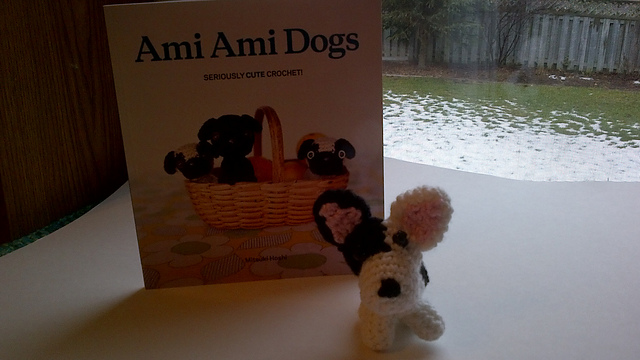
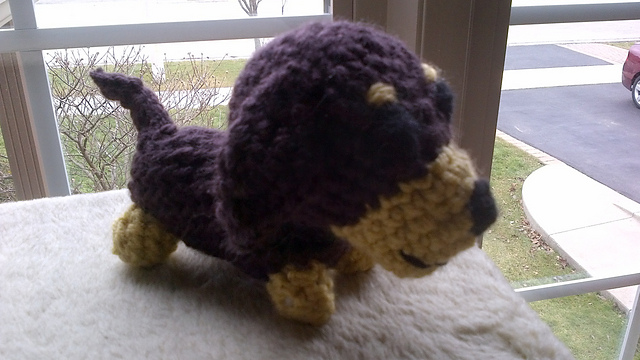
I also made the French Bulldog and a Miniature Dashound from the Ami Ami Incredibly Cute Dogs book. I imagine I will work my way through all of these little doggies. Very cute. I find it challenging to have the colour changes for the spots etc in the dogs. I will need to work on that technique.


I also need to work on a more consistent way to do the eyes. I am considering trying some clear nail polish on top of embroidered eyes, but that would only be for toys that were not intended for very small children. The beads look good, but again, I don't like that idea for babies. Once the yarn store has moved (Len's Mill Store here is moving to a bigger place, yippee!) I will get some more safety eyes for the special toys. Some people use felt and glue that on but that seems to be the same issue for me as not wanting anything that might come off for little ones if they pull on it. Perhaps if I knew who I was creating the toys for, it might make my final touches easier to decide upon!
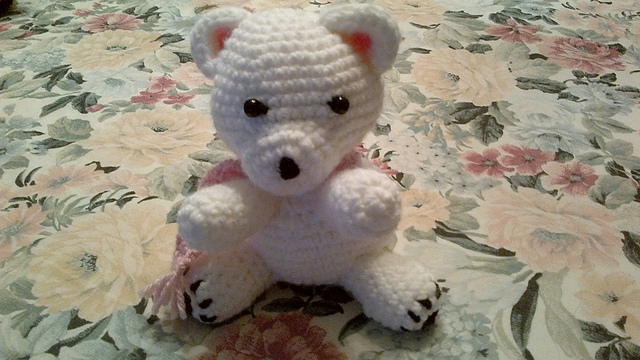
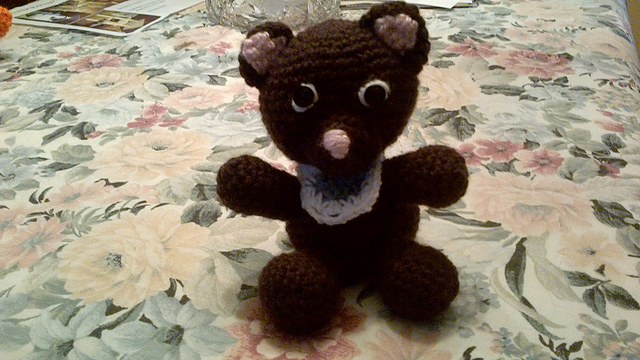
One of the groups I am in had the monthly challenge of bears, for which I made these two characters. They are quite cute! I think all children like teddy bears!


Monday, December 31, 2012

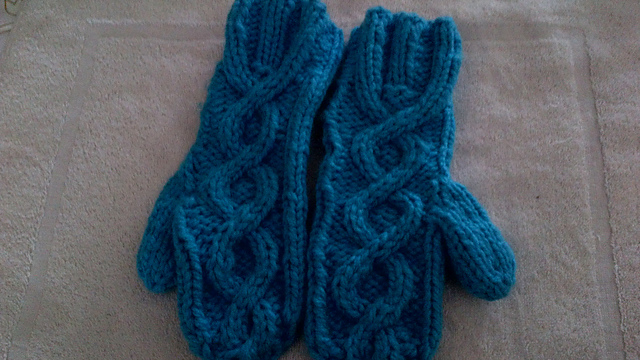
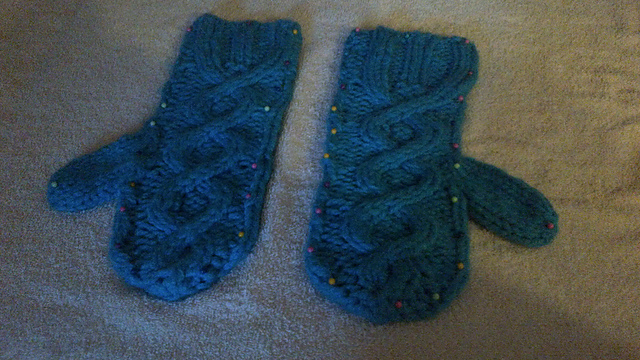
Chunky Cabled Mittens and Ramblings


These are the matching pattern to the hat I finished last month. This time I doubled up the yarn as I was not happy with the loose knit of the hat so far as warmth goes. I am very happy with the mittens, they will be warm and I like the style of them.  I worked on them often while visiting and waiting for hubby at the hospital. He should be coming home today .... fingers crossed.


I also knit a lining for the hat after I finished the mittens, in order to make it warmer. It was my own fault it was not thick enough, as it was supposed to be a chunkier yarn than Bernat Softee Chunky. None the less, I have fixed that up now as well.

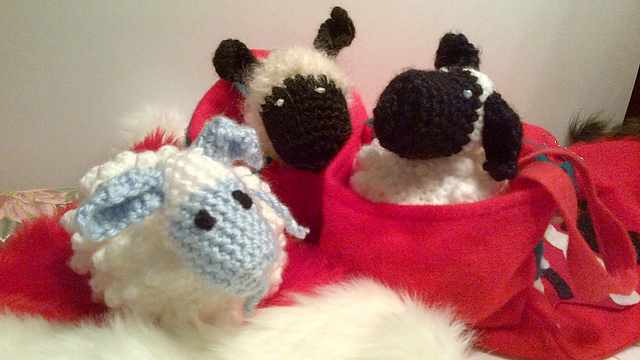
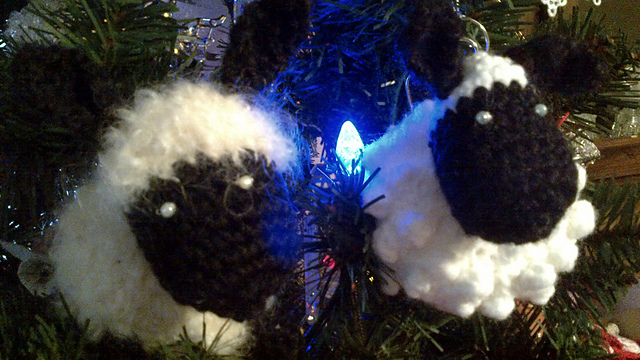
For Christmas I made many pair of mucluc style slippers for the family, some hats, a warm long mitten for hubby at dialysis, some cowls and scarves, and a shawl. And of course the toys and sweaters for the niece'sand nephew's children. The dialysis nurses ended up getting some flat Santa ornaments, or some fat Santa ornaments (my own creations), or a snowman or one of the crochet tarts. I had intended to send just the tarts and cupcakes, but hubby wanted a variety so I improvised! :D I have also made several more of the sheep, so the flock now has a blue sheep, pink sheep, black sheep, mohair sheep, and the original white sheep. Might make a few more to enter the January contest, or perhaps not. I have been entering many contests the last month, so perhaps one will be lucky.

I got some new pattern books for Christmas, one of Susan Anderson's knitted toys, and another of amigurumi dogs. I am looking forward to getting into those now, but I want to make a little more progress on the sweater I have started first. That will be an entirely new blog post I think!

Cheers, and happy New Year to all who drop by to see what I have been creating. I don't know who you are, but there are many of you from all over the world and it always makes me smile when I see how many people around the world do pop in to read. Thank you all!

Tuesday, December 18, 2012

Chubby Sheep Amigurumi


I have found so many interesting groups on Ravelry, which inspire me to create my own things. One of the recent groups I joined is called The Underground Crafter, and the moderator of this group has her own blog in which she reviews patterns and books, and she also creates her own designs. The current design is a truly adorable sheep. So far, I have made 3 of these little toys, each one very unique and sweet!


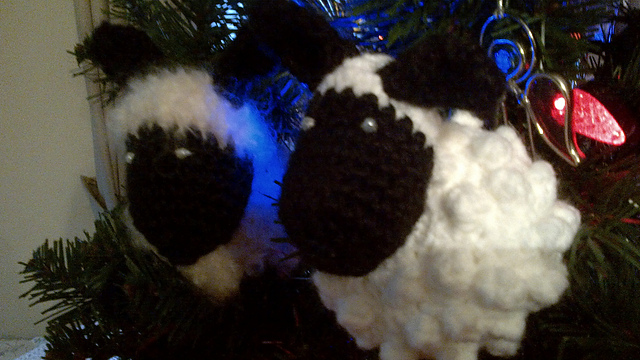
My initial sheep was completed using a skein of mohair yarn that I received in a swap package. It was a little hard to crochet with as it was so fuzzy, but I was determined to have a mohair sheep. The popcorn stitch is lost in the fluff, unfortunately, so I added some legs and a tail to it to bring it to life. This one, alas, is a favourite of one of my cats, who kept trying to steal the yarn as I was making it, and now he will pounce upon it and take it away to play with if I leave it within his reach.


I then set about making an ordinary sheep in white acrylic yarn, nothing fancy at all. I discovered in making this one that  I most likely did not do a very good job on the popcorn stitch of the mohair sheep. But, she is cute and has her own personality! She also got feet and a tail, since the popcorns were not overly well done.
Sheep number 3 was done in Caron Simply Soft yarn, and is the most like it should be. Yarn is so important, even when making toys! This is the little sheep with the blue face, legs and a blue "collar". I thought this would be a great gift for a baby .... and I like it so much I am now making another with a pink face!

So, thank you, Underground Crafter, for the joy of creating these little toys! They are quite easy, especially if you already know how to do the popcorn stitch (I know how to do it well now too!)

Underground Crafter Group on Ravelry

Underground Crafter Blog

Sunday, December 2, 2012

Christmas Fairies Amigurumi

I have several very good friends that I play Scrabble and other word games with on the internet, via Bug Cafe . If you play Scrabble, you know all about the Tile Fairy. She often favours my opponent with choice letters (LOL, you know who you are!) so I thought I might create a fairy to celebrate their word play skills. And so the amigurumi fairy was born!


Tah dah! 3 Fairies waiting for a new home!


They are also good at shelf sitting if they don't fit on the Christmas tree.


I have not finalized the wing pattern yet, but I think I favour the smaller wings on the first doll in the picture. 


I have written down the general directions for making her, if anyone is interested I would post them for you. The dress and hair I like to personalize, whatever direction the creative muse directs me, but the body and head is the same for all of them. If you follow the picture sequence, and you know some basic crochet, you would be able to produce your very own little fairy creation! The hardest part was finding stars for her wand ... these I eventually found at the dollar store in some packages of beads in the toy section. I cut a sparkly pipe cleaner for the handle of the wand and just put it through the hole in the bead and secured it that way. After all, what is a fairy without a magic wand???
The arms and legs are just a strip of single crochet (2 rows) done to the length you wish. The legs fold over the arms, and are secured with a few stitches. My legs are about 43 stitches long and the arms are about 24 stitches. For the hands. I do 3 dblcr at the ends. The feet don't need to be made larger as I crochet shoes on her later on. After the legs and arms are completed, I crochet a top onto the body. Crochet the top of the dress, then when the circle is large enough, leave small holes to poke the arms through by skipping a few crochet stitches and doing a ch3 instead. Then next round, crochet into the 3 chain stitches to secure the dress to the body. To make the front, back and sides, you stop increasing remember and just crochet around the rounds. If the top is too large, I decrease a few stitches around the waist.


Perhaps this is a clearer picture of the way the arms and dress are attached.

Continue to make the skirt of the dress. I use different innovations to make some kind of ruffled skirt. The shoes are crocheted on the bottom of the legs, sc a row, then on the second row of sc, continue passed the leg for 3 sc for the toes part of the shoe, turn and crochet to the heel then fasten off.
The head is just a sphere which is then sewn onto the shoulders. I used 3 stitches of sc on each side of the head for ears. Some of the ears I made pointy, like elf ears. If you forget to make ears before you attach the hair, it is too late!  The hair is another variable for me. Some get curly hair, some get a ponytail, and some get both! Depends on my mood of the moment. The face is usually embroidered after the hair is done, and I make a small bump for a nose, also embroidered. I use a coloured pencil to give the cheeks a blush once the facial features are done. Since these are fairies, they do need wings. This is still a work in progress for me, as all of the wings have also been different. I tried butterfly wings but they were not really what I wanted. Last I secure the wand to one of her "hands" so it does not come off. If you intend to let a little one play with the fairy, it would be better to leave the wand off or find another way to make one without the wire of the pipe cleaner.
If you do make your own, would you let me know how it turns out? I get so much inspiration from seeing what everyone else makes!


The head is attached through both the dress and the body underneath so it is able to hang from the Christmas tree, or anything else you wish!


Better view of the ears. I like them pointy!
A few of the other Christmas Fairies I made ... They evolve with each fairy, as you can see. Theses are the first fairies!


A hat for me!

I have been busy getting things ready for Christmas, and have not posted about them as that would ruin the surprise! But I have been busy making things the last few weeks.

I bought a new jacket for myself a few weeks ago and it is a very different colour from what I have had in the past, so, this means I need new hats and mittens etc to go with it. On Friday I happened to see a call for test knitters (on The Testing Pool group in Ravelry) for a hat, so I jumped into the test. I already had the yarn, 3 skeins of Bernat Softee Chunky in hot blue that I had found at the Zellers liquidation sale a few weeks earlier. Who knew I would need this colour for my new accessories? :D

The hat was a fast knit and I am very happy with it. It has 4 good sized cables around it, with a lovely wide ribbed edge. I still need to block it, but I am looking forward to wearing it once the snow returns (not too soon I hope). It will be perfect for my dialysis drives to pick up hubby.


The designer of this hat is a very young, and obviously talented designer. On reading her blog page, she is only 18. (or she was when she wrote that blog entry!). I believe she will be engineering many wonderful designs over the coming years. Thank you Katja for accepting me to test this hat for you!

Sunday, November 18, 2012

Amigurumi Birthday Cake. Want to Make One Too?

About a month ago, after seeing the little cupcakes that I had created, my son challenged me to make a cake for an upcoming birthday. Silly son, did he forget that I am always up for a challenge? :D And so, I present to you my versatile celebration cake!


I did not attach the decorative fruit toppings, thinking different things could be made for different occasions.You could make crochet icing roses or little chocolate kisses, or even do cross stitch names and greetings for the top!  Also, there is storage compartment inside the cake so the fruit and candle can be kept in there. Or, it makes a terrific toy for a little one who enjoys hosting tea parties for his or her stuffed animals or dolls.

I looked for patterns to make this, and found many patterns for cake slices, and an angel food cake, but I wanted more of a layer cake and I could not find a pattern for that, so I just went ahead and invented my own. I decided on chocolate, but of course it could be made in cream for a vanilla cake, red for a red velvet cake, orange for a carrot cake etc, -- any colour (flavour) you would like. You could even make one for a bridal shower in white with pretty roses to decorate it. Make a few tiers of varying sizes and you would have a keepsake for the bride to be to keep! (If you are going to have multiple layers, I would make sure to use something on the bottom layers to keep the sides firm -- see below --- and I would also put stuffing in to help support the layers on top) The top layer would not need to be as strong though)

The top is just a large crochet circle ..... magic ring, sc 6, join. chain1 2sc in each around the top. For the next round ( sc in first st 2sc in next) continue this pattern for the round. Next round ... sc in next 2 st then 2sc in next, continue in this pattern, increasing number of stitches between the 2sc in 1st for each row. I wanted it to be a little wavy on top rather than really flat so I did a few rows of extra 2sc, if that makes sense to you. (Every 3rd or 4th row I did not do the increase in the number of sc before the 2sc in 1 st). My cake is about 18 cm (7 inches) in diameter, but it can be made any size you like!

Once you have the desired size for the top, sc around using the back loops only. After the initial round, crochet into the full previous sc. I continued the icing colour for about 2 cm (1 inch) then I did a row of 2sc in first st, chain 2, 2sc into next st, chain 2 etc around the cake,  into the FRONT of the st only. This was to  make the icing "drip",  Cut the yarn and change to the cake colour now, and crochet into the back of the stitches behind the dripping icing.


I crocheted 4 rows (all around the cake 4 times with the cake colour), then I added a row of strawberry jam---- do not cut the yarn, just leave it for the time being and join on the jam colour. Working in the front of the loops only, as with the icing drip ..... do 2sc in first stitch, 3sc in next and continue this pattern all the way around. ss to join, then cut the jam colour and weave in the ends. Go back and pick up the main cake colour again, and work in the back of the loops (behind the jam colour) and continue to sc all the way around. I did 3 rows of sc then I added a layer of cream filling. Leave the cake colour without cutting, join on the cream colour, and again, work in the front of the loops only, do 2sc in each stitch all the way around. Ss join and cut the cream colour, weave in ends. Go back to the cake colour and work in the back of the loops, continue to sc until the cake is as tall as you want it to be. Mine is about 10 cm ( 4 inches) high. Do a ss all the way along the bottom edge (this gives you a strong base to use to attach the plastic, see directions below)


Make the base plate for the cake by crocheting a large, but this time FLAT circle at least 3 rows wider than the top of the cake. (Mine is 3 rows wider, but you could make a larger plate if you like). The edge of the cake follows the pattern  (5dblcr in first stitch, skip a stitch, ss in next, sc in next). Repeat this pattern all the way around for a picot edge on the plate.


To keep the cake standing straight, cut some plastic canvas (you can get this at the dollar store, I had some already here so I just used it, but it is easy to find). Measure the circumference of the cake very carefully, and the height of the cake and cut a rectangle of the plastic to fit perfectly. Join the short edge of the plastic so you have a tube. Put the plastic inside the cake, then use a darning needle and cake colour to whipstitch through the plastic and the bottom (inside of the cake) sc all the way around. For extra strength, and in case this is going to be a toy for a little one, I also used the cake colour and attached the plastic to the cake near the top edge with a running stitch though the cake and plastic. If the cake is used to store the decorations or other treasures, I did not want them to get stuck between the cake and the plastic, but that is probably not necessary.


Centre the cake on the base, and oversew the edge of the cake to the plate. I made sure I just picked up the top of the loop on the plate so the stitches do not show through to the bottom of the plate, but that is just my preference. I like the little finishing touches like that! If the cake is going to be used to store things, do not sew all the way around. I left about 22 cm (9 inches) open so the cake opens up to reveal a secret compartment! LOL


I crocheted little fruits and a candle to put on top, but did not attach them. You could easily sew them on for a permanent decoration if you like. The fruits are just crocheted circles in the fruit colours, then folded in half and sewn together. I embroidered little seeds or such to make them a little more lifelike. I have an orange segment, a lemon, lime, kiwi, watermelon, and a few strawberries. There is also a tiny banana hidden in there. I decided not to put stuffing in the fruit as the crochet is firm enough to "fluff" them out if I wanted them to be more 3D than flat, but a little stuffing would not have hurt.  Have fun with designing the fruit toppings! There are several patterns for strawberries on the internet, I just wing it for myself. You could make some icing flowers instead of the fruit if you wished, or any other things you want to decorate the cake with. I made a candle by crocheting a small rectangle, to fit over a plastic straw. Put the rectangle over the straw and whipstitch along the long edge. Cut the straw slightly shorter than the covering, and sew the bottom and top closed so the straw does not fall out. I made a little flame to sew on the top. Again, I just winged it .... about 3 sc, turn, do about 3 rows, then decrease by crocheting all stitches together and do a sc for the point of the flame. Turn and ss all the way to the base to make the flame stronger. Sew the flame onto the candle. My candle will stand well if supported by the fruit, but if you are only going to put candles on the cake, you may need to secure them or make some kind of base for them.


Have fun, that is what this whole hobby is about for me! It gives me a lot of pleasure to see how things turn out, and I like to try different things as I am creating.

This is not a true pattern, I know, it is just some easy directions if you are tempted to try your hand at making your own celebration cake!

My abbreviations .... sc single crochet, ss slip stitch, dblcr double crochet
It is very basic crochet, nothing overly fancy about it!