Monday, August 26, 2013

How to make Curly Doll Hair

Making doll hair can be one of the most frustrating things, but it is crucial to bring the doll to life. I have found a few ways of making a pony tail that I like, and ringlets just around the face makes a cute doll as well. Curly hair can be a challenge, if you really want it curly and not just short.


The Curly Hair Kids (over cast day so kind of a dark picture, I will try to remember to retake one outside)


Improved pictures of the dolls

This is the best way I have found so far to make curly hair. It is crocheted rather than knit, however. You do not need to be an expert at crochet to do this, as long as you can do a chain stitch, half double crochet and slip stitch, you will have no problems at all. Start by making a hair cap to fit the dolls head.

Basic hair cap ..... magic loop, ch 2, 6 half dbl cr in loop, pull tight. Join. Work in continuous rounds. 2 half dbl cr in each st. All of these hair designs was completed using a 4.5 mm hook. Caron Simply Soft yarn for the lighter tan hair and Waverly for the pink doll hair in a darker beige.

Working increase rounds


No increases, just half double crochet around for the sides of the hair cap


Now, you are worried because this is making a very loose fabric ... that is okay. You are going to be adding lots of curls to it later on. You do NOT want this to be a tight fabric. Keep it loose. You also want some easy loops to be able to join the curls to. So, after you have the base circle started, (12 st), you are going to crochet in the BACK loop only of each stitch for the rest of the hair cap. The front loops will become the joining place for the curls and it is very easy to crochet into them if they are unattached.
Crochet into the back of the loops only

The hair cap is worked in half double crochet stitches.

Next round, crocheting only into the back of the stitches, 1 half dbl cr, inc in next stitch.
Next round, half dbl cr in 2 st, inc in next
Next round, half dbl cr in 3 st, inc in next
Continue this pattern until the hair cap is the right size for the top of the dolls head. You will need to try it on the doll to check periodicall.. Once you have the size you need, stop the increases and just do the half dbl cr in continuous rounds until the hair cap is the right size for the doll.  When you have just one round left, work some decreases. I do 5 dblcr then 1 dec all the way around. This just keeps the hair snug on the head while you sew it on.

Sl st to join once you have the desired size but do not fasten off.
Finished hair cap, ready to start curls!


Curls .... chain 2, then sl st into one of the loops close to the hook. ch 2 slst into another loop diagonal to the first loop you used. ch2 slst into another loop diagonal to the last loop you used.


Circle back to fill in spaces as you work. I don't mind if the curls cross over each other to get to an empty place now and then.

About half done

Continue to do this to work your way randomly around the hair cap. Try not to go in straight lines either across the hair cap or vertically. You want the curls to be random. I work about 3-4 rounds of loops at a time, gradually filling the hair with curls. I don't use a set pattern, but it is ( ch2 slst into hair cap, ch2 slst ) changing rows and directions with each loop on the hair cap. I work about 1/4 of the hair cap at a time then gradually overlap the chains to I am working in a new area. If you notice a patch seems to have fewer curls in it, just work you way back to it and fill in some more, just make sure you don't leave a long straight chain on top to get there.

You can experiment with different length chains if you want longer curls, perhaps a ch 3 or ch4 between the slst.

Once you are happy with the thickness of the curls, slip stitch and fasten off but leave a long tail to sew the hair onto the doll.

Viola! You now have a curly headed doll!

I have used a sc base and the half double crochet base, and I really think the half double crochet base is much easier to work with, and is much lighter than the finished result with a tighter hair cap. The doll with the pink dress at the top was done using a sc for the hair cap, and I found it more difficult to keep the stitches random. As a result, some of her curls are close to being in organized rows. The other 2 dolls were done with the half double hair cap and a very random arrangement of curls. The final result in thickness of curls is the same. The half double method takes considerably less time to make the hair cap as well.

Pink doll, hair cap done in sc. It was hard to get the hook through the stitches in places,


half double crochet hair cap base. Let the curls meander as you create them!


Thursday, August 8, 2013

Doll Picture Time!

Presenting my version of the fashion doll by Jean Greenhowe, in a dressable version!
You can tell how much fun I had changing her clothes for all the pictures. I guess I am still a child at heart!

Miss Amelia in her bloomers, from the doll pattern. I added a few rows of ribbing across the top rather than sew them onto the doll.

The pink sundress is an short version of the dress given in the pattern. I had to improvise the top as it was originally knit as part of the doll. The dress ended up being too wide, so I had to use the sewing machine to take it in some rather than redo the entire dress. I think that is called steeking ... have not tried that before.
The yellow top is entirely my own design. I need to perfect it, but it is useful as it is. It can be worn with either side to the front so does double duty.
The shoes are an adaptation of a pattern for an American Girl doll. It is from Knitting Nelly's Yarn Cache blog, going back to 2008.basic doll shoe pattern
I used 4.5 mm needles to make the shoes, and increased the cast on stitches to 22. For the marker placement, I then had 10-2-10. I added 3 rows of garter stitch so they were higher, and added a simple single crochet chain of 12 stitches for the strap.


Sundress and Shoes


Sweater as a short sleeve cardigan


Sweater with buttons at the back for a top and skirt effect


Sweater under the dress as a t-shirt


The dress is from another pattern, Amelia Doll Tunic which I found on Ravelry for free. It was designed by Kristin Maw. It can be made into a sweater or a dress with many variations. 
The lighter violet clothes are again my own creations. 

Back of dress


The shoes are from the same pattern as the pink shoes, but I did them in 2 colours and instead of doing the top of the shoes in garter stitch, I did them in a stockinette stitch.


Striped top and skirt, designed by me!


Top worn with buttons on the front for a different look


Solid top and skirt. Not happy with the way this top turned out, but it is useful as another change for the doll.


The back (or it can be worn at the front) of the solid top has a bit of a collar effect, which I liked. But I knit it so the stitches are horizontal rather than vertical and am not really sure I like that effect. It was a design experiment! 

So, there you see my dress up doll. It was great fun making all the things for her and trying them on. I plan on making another doll, perhaps in pink, and another set of clothing as well. 


Wednesday, August 7, 2013

Back to my doll making roots!

Busy with many different projects, quite a few test knit and crochet projects. I learn something new from almost every new pattern that I try! I do keep my Ravelry project page quite up to date but I have been lax in posting here of late it seems.

A few weeks ago, one of the nurses asked me to make another of the Jean Greenhowe Dainty Dollies for her for her new niece. I was only too happy to oblige! This is a free pattern from Jean Greenhowe, but I customize the clothing and hair styles according to my whim of the moment. I ended up making 5 of the dolls to give her a choice. When I brought them in to show her, one of the nurses asked if I could make one that had removable clothing for her daughter, who is a little older. This set me off on my current quest.

After scouring the doll patterns I have, I decided the Jean Greenhowe Fashion doll was the most likely to turn out according to the pictures I had in my mind. The initial doll I made in skin tone, rather than the pink that I seem to favour for the babies. I had to redo the face three times to get it just right, but I think it paid off. She has a pony tail hair, with very thick curls coming out of the tie.

Clothes turned out to be a big challenge. The bloomers were not too hard to make, as they were given in the pattern. I just had to add a few rows of ribbing to the top rather than sew them on, and I made the legs shorter than the pattern (although they are perhaps still a tad too long).  I initially made the pink skirt using the dimensions on the original pattern, but that ended up to be much too wide for the doll as it was not going to be sewn on and gathered. Rather than waste it, I decided to try my hand at steeking so out came the sewing machine. Not perfect, but a most suitable sundress for a doll resulted from my efforts.

Next came a yellow sweater which was entirely my own pattern. I did keep track of what I did and will work to improve this over the next few dolls. This can be worn with the buttons at the front for a cardigan, or with the buttons at the back for a top, and either over or under the sundress. Next I worked on making some shoes for her. I tried 2 of my own inventions, both of which found their way into the scrap pile to be used for stuffing in another toy. I then found a pattern for some shoes for an American girl doll, which I had to alter to make them large enough for my doll. But the resulting shoes are very cute!

Time to switch colours. Out came 2 shades of violet. First up was a dress that I found a pattern for. The dimensions seemed to be about right so I stayed true to the pattern for this one. It fits the doll but is a little wide at the waist, so I will alter that for the next doll. There are many patterns for cardigans for dolls but none that I found for anything else, and you need clothes to put under the sweater! So I set about designing a tank top. My first attempt is okay but I would not make it again. It is knit sideways so the stitches run horizontal rather than vertically. That is not the problem, but the overall effect is not what I was hoping for. It can be worn with either part on the front. One is a solid colour and the reverse side has the buttons and a collar effect where I sewed the straps on the reverse side. My second tank top, the striped one, turned out much more like my visualization. I will be writing that pattern up here if anyone is interested in making it. Then I needed a skirt or pants to wear with the tops, as the violet dress did not lend itself to layering like the pink sundress does. Rather than go with another gathered skirt, I made more of an A line skirt, with slight gathers at the waist, a decorative crochet tie and a faux bow. Another pair of shoes to co-ordinate with the violet set.

I am working on another small test at the moment, but once it is finished I will be making another of the dolls with another set of clothing. I won't really mind if the nurse is not satisfied with them, as I have become quite attached to the first one I made and I can see keeping her for myself!

Patterns to follow for the striped top and A-line skirt, and many pictures of my little doll (I have named her Amelia, which might be the name of the doll she was based on by Jean Greenhowe) I will also add links for the other patterns I used that are available online for any other doll makers.

Wednesday, May 29, 2013

GRRRR Beware of the Lions!

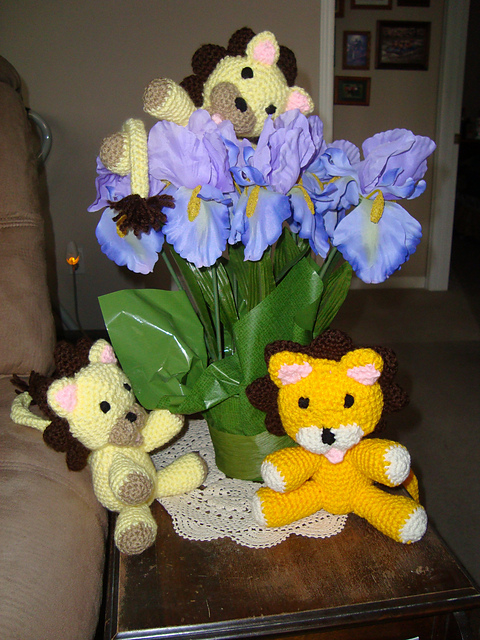
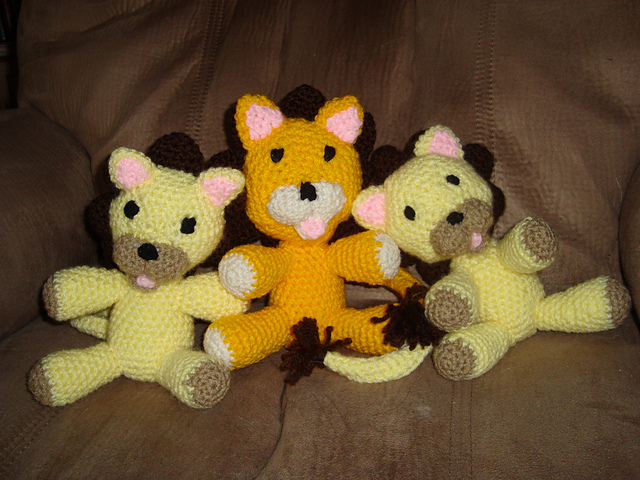
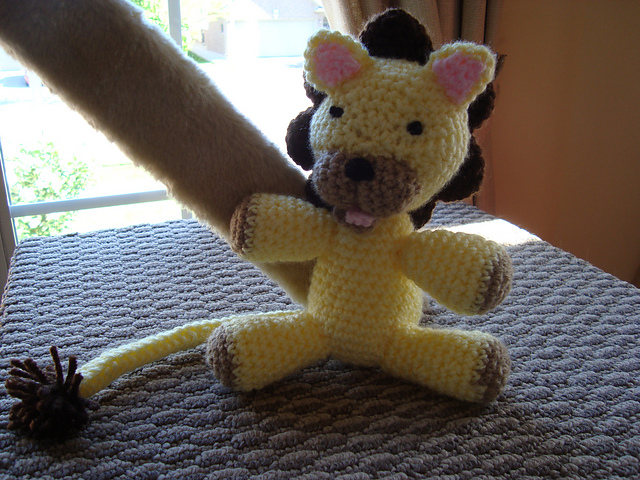
Another test project from Nerdy Knitter Designs. This is Kon, inspired by a cartoon I have no clue about. But, I am totally in like with this little guy. It is a fast project and does not require much in the way of yarn. I should have taken a close up of his mouth as it is so cute. The jaw is a separate piece as is his little tongue hanging out. If you enjoy making toys, this is one to consider! The mane is constructed of triangles, rather than a yarn fringe, which would make it much better for younger children since they are more secure and less prone to being pulled out over time. The tail tuft was secured by individual yarn lengths being knotted rather than as a pom pom, but a small pom pom would work just as easily.


The pride of young lions lurking in the iris, pretending to prowl the depths of the jungle looking for adventures.

Relaxing in the lounge chair after the stress of the photo shoot


The first lion to take shape, introducing Kon!


Friday, May 24, 2013

Intarsia Blanket ... so colourful and toasty warm!

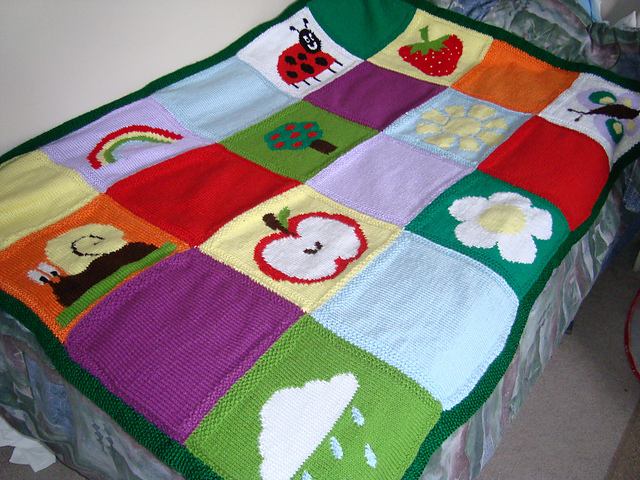
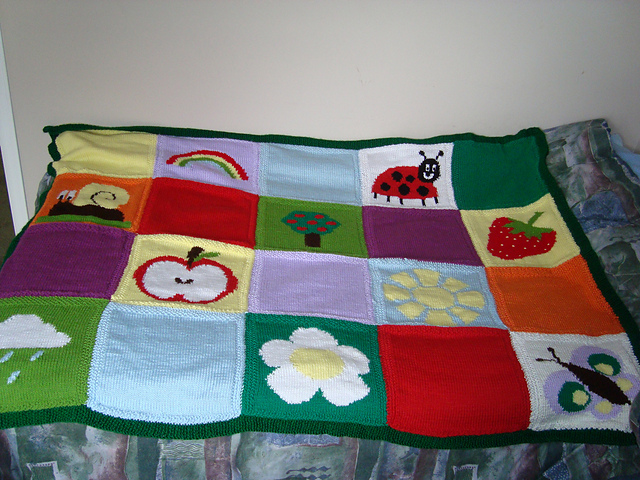
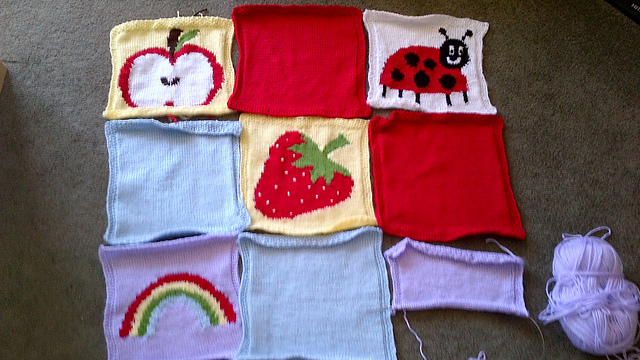
The last month has found me busy creating a very good sized blanket, using intarsia. This is another test knit from the Ravelry group. It is made of 20 squares, half of which are done with a nature themed intarsia design, and the other half are colourful solid colours. It was a lot of work, but well worth it. I really like the finished blanket. It took about 11 skeins of yarn and close to (or over) 100 hours of work to complete.


Each of the squares has its own design chart, so it will also be easy to add the designs to sweaters or other things. I think it would also make a lovely baby blanket is only 9 squares were used. So many ideas have run through my mind while working on it! If only there were more hours in the day for knitting! LOL Or, perhaps if I knit faster it would accomplish the same thing!


Finished blanket on a twin size bed


Some of the squares early in the process of creation


Until next time then. Working on a few small toys for a few weeks now, so will post about them as they get finished.

Friday, April 12, 2013

Everybody Needs a Minion or Two!

Here they are, the first of my Minion army!


I used mainly this pattern http://wolfdreamer-oth.blogspot.ca/2010/07/despicable-minion.html but I also used parts of 3 other patterns that I found. Of course I changed things from one minion to the next, trying to tweak the look and the process. More shall be forthcoming!


Hubby prefers the shorter minions with BIG eyes, and the black mouth rather than the yellow lips. I will continue to tweak!


Thursday, April 11, 2013

Unicorn, Blanket and Cowl

Finished the entrelac baby blanket, and I am quite pleased with it. I put an I cord edging along it to control all the colour changes and yarn ends. It will keep some little baby very toasty!


I finished a few test projects as well:

A unicorn in crochet. She has sequins all over but the photos don't really show them sparkling. This is the unicorn as given in the test pattern. After the pictures were taken and I reported the project to the designer, I redid the horn so it is finer and a little pointier. I crocheted a rectangle, and then sewed the long edges together around a piece of plastic straw that I cut to size. I am much happier with my version of the horn.


A cowl for myself. This is not a large one, so would be suitable for cool spring and fall days, as well as under a coat in winter time. It was a nice pattern to work with. I might try to make one a little wider at a later time. It did not need much yarn at all, perhaps half of a skein as it is now.


At present I am working on making a small army of Despicable Minions .... they are so darn cute! They need their own entry I think! :D